
How to Learn Ableton Live in 2026: A Realistic Roadmap
Learning Ableton Live isn't as difficult as the internet makes it look, but the way most people try to learn it is wildly inefficient. After 20 years of producing electronic music and over 11,000 hours of one-to-one Ableton tuition, I've watched hundreds of students go from opening the DAW for the first time to releasing finished tracks. The ones who progress fastest all have one thing in common: they follow a structured path and they get feedback on their work. The ones who stall? They're usually stuck in a loop of watching random YouTube tutorials and wondering why nothing clicks.
This guide is the honest roadmap I wish existed when I started. No hype, no "learn Ableton in 30 days" nonsense, just a clear breakdown of what to focus on, in what order, and what to expect at each stage.
Start With the Foundations, But Make Something on Day One
Here's what I do in a first lesson with a complete beginner: we cover the Ableton Live interface, set up their audio preferences, and by the end of that 90 minutes, they've built a simple loop. Not a finished track. Not a masterpiece. A loop, maybe 1 bars of drums, a bassline, and a simple melodic element.
Why? Because you need to understand the basics of how Ableton is laid out before you can do anything meaningful. You need to know what a clip is, what a track is, how the browser works, where your sounds live. But you also need to make something immediately, because that's what keeps you coming back. If your first session is three hours of reading the manual, you'll lose motivation before you've made a single sound.
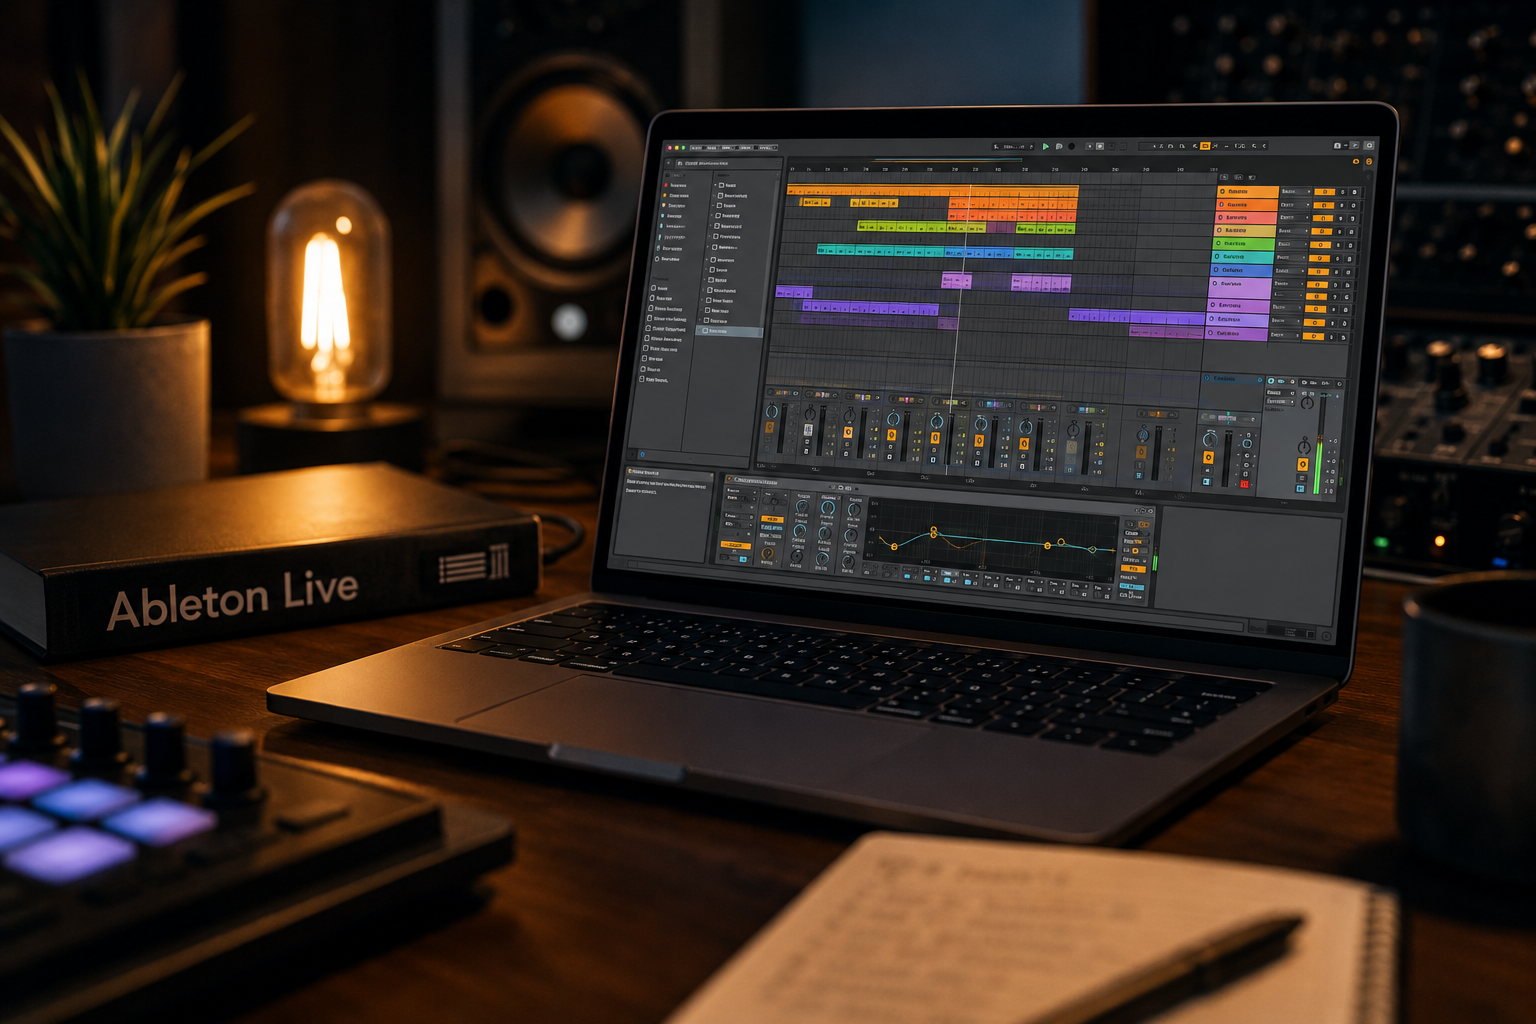
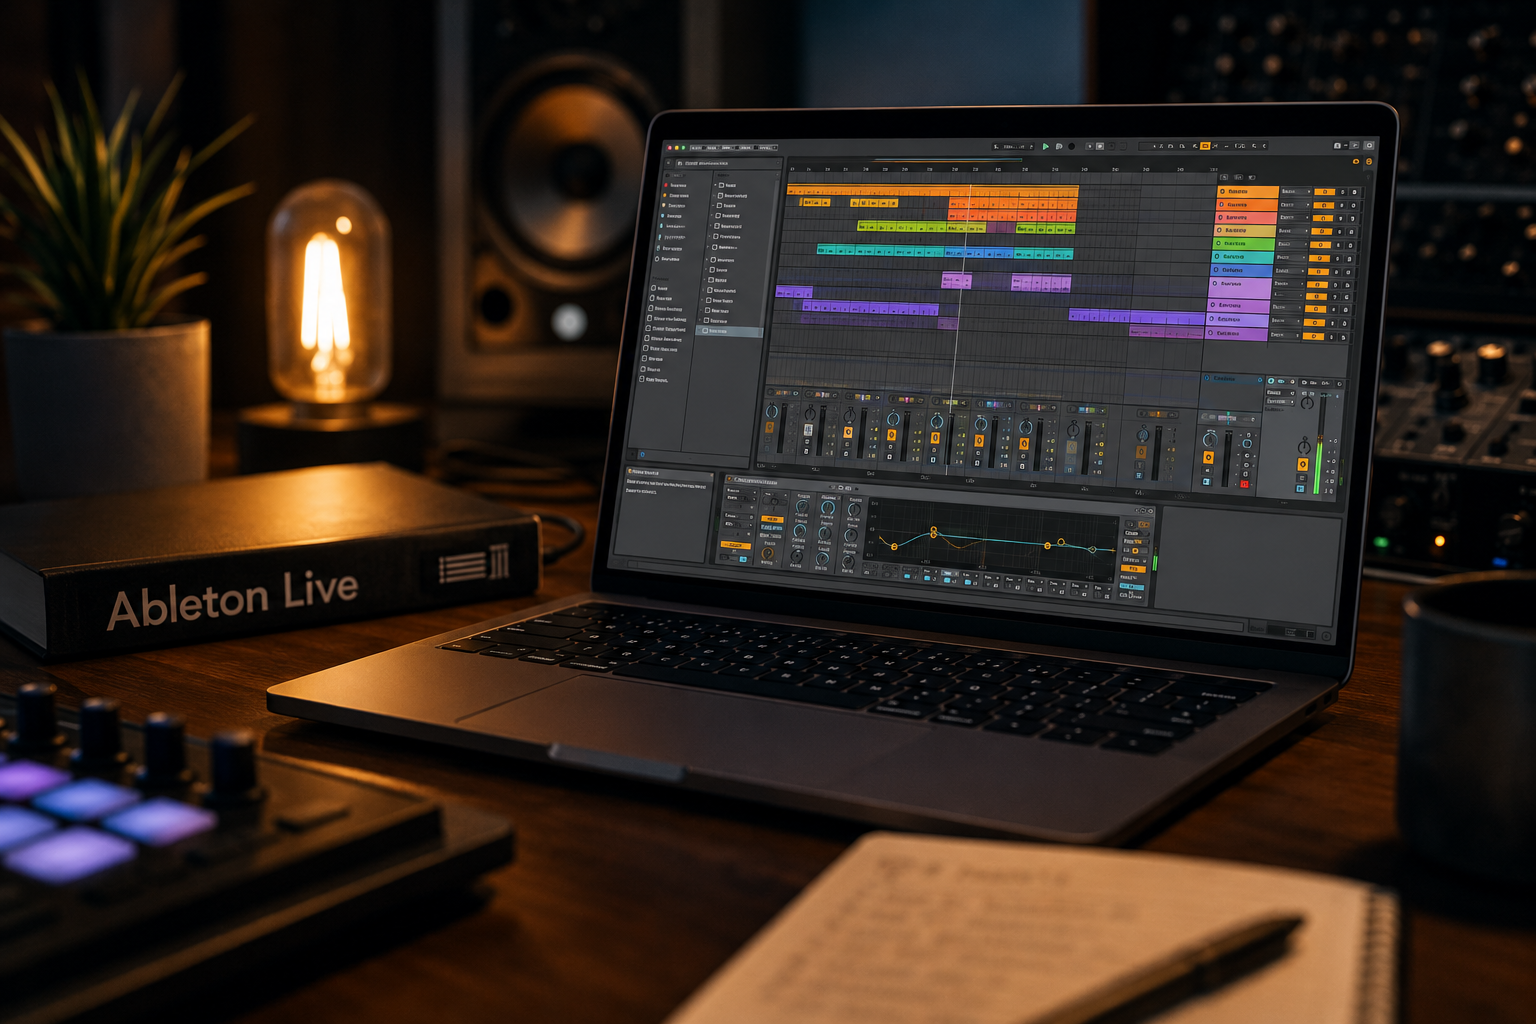
The interface can feel overwhelming at first glance. Ableton has two main views, Session View and Arrangement View, plus a browser, a detail view for devices, and a mixer. That's a lot of panels. But here's the thing: you don't need to understand all of it on day one. You need to understand enough to put sounds on a timeline and hear them play back. Everything else gets layered in as you need it.
Most online guides try to be comprehensive from the start. They'll spend 45 minutes walking you through every single menu option before you've heard a kick drum. That's backwards. Learn the interface through the process of making music, and the knowledge sticks in a way that passive watching never achieves.
Why YouTube Tutorials Aren't Enough
I need to be direct about this because it's the single biggest misconception I see: watching YouTube tutorials is not the same as learning Ableton Live.
Don't get me wrong, there's brilliant content on YouTube. Channels covering sound design, mixing, arrangement, creative techniques. I'm not dismissing any of that. But there are two fundamental problems with relying on tutorials as your primary learning method.
First, there's no feedback loop. You can follow a tutorial step by step, recreate exactly what the creator did, and end up with something that sounds decent. But the moment you try to apply that technique to your own music, with your own sounds and context, it falls apart, and you have no idea why. A tutorial can show you what to do. It cannot tell you why your version doesn't sound right. That gap between following instructions and actually understanding what you're doing is enormous, and it only gets filled through feedback from someone who can hear what you're hearing and diagnose the problem.
Second, there's no structure. YouTube's algorithm doesn't care about your learning path. It cares about watch time. So you end up bouncing from a video on sidechain compression to one on Wavetable synthesis to one on mastering, with no logical progression. You accumulate fragments of knowledge with massive gaps between them. You might know three ways to make a supersaw but have no idea how to EQ a kick drum. That scattered, Swiss-cheese knowledge base is one of the most common things I see in students who come to me after months or even years of self-teaching.
Tutorials have their place. They're great for inspiration, for discovering techniques you didn't know existed, for solving a specific problem when you already have a strong foundation. I have a YouTube channel myself, but I deliberately gear that content towards intermediate and advanced producers rather than beginners, because I know that beginner-level learning is best done with structure and feedback, not by passively watching videos. But as a primary learning method for someone starting out? Tutorials alone are the slow road.
The Stages of Learning Ableton (As I've Seen Them Over 15 years of teaching)
I don't use a rigid, one-size-fits-all curriculum. Every student I work with gets a path tailored to their goals, their genre interests, and their current level. Someone who wants to make techno has a different journey from someone producing ambient music or hip-hop beats. That said, after teaching this many hours, I've noticed that students tend to move through recognisable stages, even if the specifics differ.
Stage 1: Getting Comfortable
This is where you learn to navigate the DAW without it feeling like a foreign language. You understand clips, tracks, the browser, basic audio and MIDI concepts. You can drag in samples, draw in MIDI notes, use a few effects. You can build a loop and it doesn't feel like a battle.
For most people, this takes somewhere between 2 and 6 weeks of regular practice, maybe 3–5 hours a week. If you're working with a tutor, you can compress this significantly because you skip the hours of Googling "why is there no sound coming out" (it's almost always the audio preferences or the monitoring settings, by the way).
Stage 2: Building Ideas
Now you can put sounds together without fighting the software. This is where the creative work really begins. You're building loops, experimenting with different sounds, starting to develop an ear for what works. You might not be finishing tracks yet, and that's completely fine. You're learning to generate ideas.
This is also where most people hit their first real wall: the 8-bar loop trap. You make something that sounds good, 8 bars of drums, bass, maybe a pad, and then you have no idea how to turn it into a full track. This is normal. Arrangement is a skill that takes time to develop, and it's one of the hardest things in music production because it requires you to think about time, energy, tension, and release in ways that loop-making doesn't.
Stage 3: Finishing Music
The jump from "I can make cool loops" to "I can finish a track" is where most self-taught producers get stuck, sometimes for years. It involves arrangement (structuring your ideas over time), basic mixing (making your elements sit together and sound clear), and the discipline to call something done.
This stage is also where tailored guidance makes the biggest difference. The specific challenges you face in finishing a techno track are different from finishing a house track or a drum and bass track. Genre conventions, energy curves, arrangement structures, these all vary, and having someone who understands your target genre and can point you in the right direction saves an enormous amount of time.
Stage 4: Refining Your Craft
This is open-ended and, truthfully, never really ends. You're finishing tracks, but now you want them to sound better. You dig deeper into mixing, maybe start learning mastering. You develop your own sound design techniques. You get more efficient with your workflow. You start to develop a personal style.
Some students reach this stage in 6 months. Others take a couple of years. The timeline depends entirely on how much time you put in, what your goals are, and whether you're getting quality feedback along the way.
What to Focus On First (And What to Ignore)
If you're just starting out with Ableton Live in 2026, here's what I'd prioritise, and what I'd deliberately leave for later.
Focus on now:
The Ableton interface and navigation. Learn Session View and Arrangement View. Understand clips, tracks, scenes. Get comfortable with the browser. Learn the key shortcuts, Cmd/Ctrl+D to duplicate, Tab to switch views, 0 to deactivate clips. These basics will speed up everything that follows.
Making beats with samples. Before you touch a synthesiser, learn to work with audio samples. Drag drum samples onto an audio track or into Drum Rack. Build a simple beat. This teaches you the fundamentals of rhythm, timing, and arrangement without the complexity of synthesis.
Basic MIDI. Learn to draw MIDI notes, use a simple instrument (try a preset in Drift or Simpler), and understand velocity. MIDI is how you'll write melodies, chords, and basslines, so get comfortable with the MIDI editor early.
Simple effects. EQ Eight, Compressor, Reverb, Delay. You don't need to master these yet, just understand what they do at a basic level. "EQ shapes the tone, compression controls dynamics, reverb adds space, delay adds rhythm." That's enough to start.
Leave for later:
Advanced sound design. Wavetable, Operator, and FM synthesis are deep topics. They're rewarding, but they'll slow you down if you dive in before you can comfortably build and arrange a track.
Mastering. You don't need to think about mastering until you're consistently finishing mixes. Worrying about LUFS and limiting when you can't arrange a track is putting the cart miles before the horse.
Third-party plugins. Ableton's stock devices are phenomenally powerful. I've been teaching with them for years and they cover the vast majority of what you'll need. Resist the urge to buy plugins to solve problems that are actually skill gaps - every additional shiney new toy you buy extends your learning curve.
How Long Does It Take to Learn Ableton Live?
This is one of the most common questions I get, and the honest answer is: it depends entirely on what "learn" means to you. I go in to depth on this subject in another article here, where I explain there are many layers to learning music production.
If "learn" means you can open Ableton and build a basic beat? A few weeks of focused practice.
If "learn" means you can produce a finished track that sounds decent? Typically 6–12 months of regular work, assuming you're practising several hours a week and getting some form of structured guidance.
If "learn" means you're producing at a level where your tracks can compete on labels? That's usually a multi-year journey. There are no shortcuts here. The musicians and producers who make it look easy have thousands of hours behind them.
The most important factor isn't talent, it's consistency. Thirty minutes a day will get you further than a marathon session once a fortnight. Your brain needs regular repetition to internalise workflows, develop muscle memory with the software, and build your ear.
The Best Way to Learn Ableton Live in 2026
You have more options than ever: YouTube, online courses (Coursera, Udemy, Skillshare), Ableton's own learning resources, forums, Discord communities, and one-to-one tuition.
Here's my honest take on how to combine them effectively:
Use Ableton's built-in resources, Learning Music (learningmusic.ableton.com) and Learning Synths (learningsynths.ableton.com) are genuinely excellent, interactive, and free. Start there.
Pick one structured course or tutor and stick with it. The biggest mistake is jumping between five different YouTube channels and three courses simultaneously. Pick one path and follow it through. Depth beats breadth, especially at the beginning.
Practice with intention. Don't just noodle. Set a goal for each session: "Today I'm going to build a 4-bar drum pattern and add a bassline." Small, specific goals keep you progressing.
Get feedback on your work. This is the accelerator that most self-learners miss entirely. Whether it's a tutor, a production buddy, or a community that gives honest critiques, someone needs to hear your work and tell you what's working and what isn't.
Make music you actually want to listen to. If you love techno, learn to make techno. If you love ambient, make ambient. Motivation is everything in the early stages, and nothing kills motivation faster than forcing yourself to make music you don't care about.
Frequently Asked Questions
Can I learn Ableton Live for free?
Yes, to a point. Ableton's own Learning Music and Learning Synths tools are free and excellent for fundamentals. YouTube has thousands of tutorials. But free resources lack structure and personalised feedback, which is where most self-learners plateau. Think of free resources as a starting point, not the entire journey.
Do I need to know music theory to use Ableton?
No. Ableton Live 12's scale mode lets you lock your notes to a key, so you can write melodies and chords without formal theory knowledge. That said, understanding basic concepts like keys, chords, and song structure will make you a better producer over time. You don't need to learn it first, learn it alongside your production skills.
Is Ableton Live better than FL Studio for beginners?
Both are excellent DAWs. Ableton tends to suit people interested in electronic music, live performance, and experimental workflows because of its Session View and real-time capabilities. FL Studio has a more visual pattern-based workflow that some beginners find intuitive. The best DAW is the one you enjoy using. If you're reading this blog, you're probably already leaning towards Ableton, and it's a fantastic choice.
How many hours a week should I practise?
Consistency matters more than marathon sessions. Three to five hours a week, spread across several shorter sessions, is a solid starting point. Even 30 minutes a day will compound into real progress over months. The key is regularity. Your brain consolidates skills between sessions, so daily short practice beats weekly long sessions.
Should I buy Ableton Live Intro, Standard, or Suite?
Start with Intro or Standard. Suite is powerful but overwhelming for beginners, you don't need Wavetable, Operator, and Max for Live on day one. Ableton offers educational discounts and upgrade pricing, so you can start smaller and move up when you've outgrown your current version. I cover this in detail in my Intro vs Standard vs Suite comparison.
Ready to Fast-Track Your Progress?
If you're tired of scattered YouTube tutorials and want a clear, structured path tailored to your goals, that's exactly what I do. I've delivered over 11,000 hours of one-to-one Ableton Live tuition since 2014, working with complete beginners through to advanced producers.
Every lesson is 90 minutes, fully personalised, and recorded so you can rewatch anytime. Whether you want to learn Ableton from scratch, finish your first track, or level up your mixing, we'll build a plan around where you are and where you want to be.
Music Production for Beginners: 25 Essential Terms You Need to Know
Are you just starting your journey into music production and feeling overwhelmed by all the technical terms? You're not alone! Words like 'DAW,' 'MIDI,' and 'compression' can sound like a foreign language at first. But don't worry – every successful music producer started exactly where you are now. To help you confidently step into the exciting world of making your own music, we've put together a list of 25 super important music production words, explained in a way that makes perfect sense from day one.
This beginner's guide to music production terms will make your learning much smoother and help you understand the core ideas behind creating great music. Let's clear up the confusion and get you started on your path to becoming a music producer!
Your First 25 Essential Music Production Terms
1.ADSR (Attack, Decay, Sustain, Release): Imagine how a sound starts, holds, and then fades away. Attack is how fast the sound begins. Decay is how it quickly drops a bit after starting. Sustain is how long it stays at a steady level while you hold a note. Release is how it slowly disappears after you let go. It's like the sound's journey from start to finish.
2.Audio Interface: This is a special box that helps your computer talk to your microphone or musical instruments. It takes the sound from your mic or instrument and turns it into something your computer understands, and then turns computer sound back into something you can hear through your speakers or headphones. It's essential for getting clear sound in and out of your computer for home studio recording.
3.Bit Rate: Think of this as the amount of detail in your digital music file. A higher bit rate means more information is stored, which usually means the sound quality is better and clearer. But it also means the file will be larger.
4.Bouncing: This is like taking all the separate musical parts you've created (like drums, bass, vocals) and mixing them down into one single audio file, such as an MP3 or WAV. It's a way to combine everything into a finished song or a single track, often used in music production workflow.
5.BPM (Beats Per Minute): This simply tells you how fast or slow your song is. If a song is 120 BPM, it means there are 120 steady beats in one minute. It sets the overall speed and feel of your music, a key element in song arrangement.
6.Clipping: This happens when your music signal is too loud for your equipment or software to handle. It creates a harsh, crackling, or distorted sound. It's like turning the volume up so high that the sound breaks. Avoiding clipping is crucial for clean audio recording.
7.Compression: This is a tool that helps control the loud and quiet parts of your music. It makes the really loud sounds a bit softer and the very quiet sounds a bit louder, so everything sounds more even and smooth. This makes your music sound more professional and balanced, a vital part of audio mixing.
8.DAW (Digital Audio Workstation): This is the main computer program you'll use to create, record, arrange, mix, and finish your music. Think of it as your entire music studio, but inside your computer. Popular examples include Ableton Live, Logic Pro, and FL Studio. Learning your DAW is the first step in how to make music.
9.Decibel (dB): This is a unit used to measure how loud or quiet a sound is. In digital music, 0 dB is the absolute loudest your sound can be before it starts to distort (clip). You usually want to keep your sounds below this level for optimal audio levels.
10.EQ (Equalization): This is like a special tone control for your sounds. You use it to adjust different frequencies (like bass, mid-range, or treble) in a sound. You can make a sound brighter, warmer, or clearer by boosting or cutting certain frequencies. It helps each instrument fit perfectly in your song during music mixing.
11.FX (Effects): These are special tools you add to your sounds to change how they sound. Common effects include Reverb (makes sounds echo like in a big room), Delay (repeats sounds like an echo), and Distortion (makes sounds gritty or fuzzy). They add flavor and depth to your music, enhancing sound design.
12.Gain: This is the initial volume level of a sound as it enters your recording system, for example, from a microphone or an instrument. Setting the right gain is important to get a strong, clear signal without it being too quiet or too loud (which would cause clipping). Proper gain staging is a fundamental music production tip.
13.Latency: This is the tiny delay you might notice between when you play a note (like on a keyboard) and when you actually hear the sound come out of your speakers or headphones. For recording and playing music in real-time, you want this delay to be as small as possible for a smooth recording experience.
14.Loop: A loop is a short piece of music or sound that is designed to repeat seamlessly over and over again. You can use loops for drum beats, bass lines, or melodies to build up the different parts of your song, a common technique in electronic music production.
15.Mastering: This is the very last step in making a song ready for the world. After you've mixed all your tracks, mastering makes sure your finished song sounds great on all types of speakers and streaming services, and that it's loud enough to sound professional alongside other released music. It's the final polish for professional audio.
16.MIDI (Musical Instrument Digital Interface): MIDI isn't actual sound, but rather a set of instructions that tell musical instruments and computer programs what to do. When you play a MIDI keyboard, it sends messages (like "play this note," "at this volume," "for this long") to your DAW, which then tells a virtual instrument what sound to make. It's key for digital music creation.
17.Mixing: This is the process of blending all the individual sounds and instruments in your song together so they sound balanced, clear, and work well as a whole. It involves adjusting volumes, using EQ, adding effects, and placing sounds in the stereo field (left/right). Effective mixing is crucial for great sounding tracks.
18.Panning: This is about placing sounds in your mix so they appear to come from the left speaker, the right speaker, or anywhere in between. It helps create a wide and interesting sound picture for your listeners, adding depth to your audio production.
19.Plugin: These are like small add-on programs that you can use inside your main music software (DAW) to give it more features. They can be virtual instruments (like a software piano or synthesizer) or special effects (like a better reverb or compressor). Plugins are essential music production tools.
20.Reverb: This effect makes a sound seem like it's happening in a real space, like a large concert hall, a small room, or even a cave. It adds a sense of depth and atmosphere by simulating the natural echoes and reflections you'd hear in those spaces. It's a common audio effect.
21.Sample: A sample is a small piece of pre-recorded audio that you use as a building block in your own music. It could be a single drum hit, a short vocal snippet, a sound effect, or even a small part of another song. Sampling in music is a popular technique.
22.Sequencer: This is the part of your DAW where you arrange your musical ideas over time. You can draw in MIDI notes, record audio, and build the structure of your song, section by section, like putting together building blocks. It's fundamental for songwriting and arrangement.
23.Tempo: (See BPM) This is just another word for the speed of your music, measured in Beats Per Minute. Understanding tempo is vital for rhythm and groove.
24.Tracking: This simply means the process of recording each individual part of your song, one by one, onto separate tracks in your DAW. For example, first you record the drums, then the bass, then the vocals, and so on. It's the foundation of multi-track recording.
25.VST (Virtual Studio Technology): This is a very common type of plugin format. Many of the virtual instruments and effects you'll use in your DAW will be VSTs. (If you use a Mac computer, you might also see AU, which is Apple's own version of plugins). VSTs are key for digital audio production.
Ready to Dive Deeper? Your Next Step in Music Production
Learning these 25 words is a fantastic start, but the real fun begins when you actually use them to make music! If you're serious about turning your musical ideas into finished songs, having someone guide you step-by-step can make a huge difference. That's exactly what our beginner music production course is for.
At Decloak Music, we believe in teaching you in a way that makes sense for you. Our Ableton Live Beginner Course is perfect if you're completely new to making music. In 12 one-on-one online lessons, we'll show you everything you need to know to create a full track from start to finish. We'll cover how to use Ableton Live, how to build drum beats, basslines, and melodies, and how to make your songs sound great with effects and mixing. We'll even teach you basic music theory and smart ways to work, all based on the kind of music you love.
By the end of the course, you'll feel confident using Ableton Live and be able to create your own drum patterns, basslines, and melodies. You'll learn how to put a full song together, use tools like EQ and reverb, and understand the basic ideas behind music production. If you've always wanted to make your own music but didn't know where to begin, this online music production course is your perfect starting point. Learn more here: Decloak Music Ableton Live Beginner Course
About Decloak Music and Your Journey
Decloak Music is all about helping people like you make their own music. We offer friendly, one-on-one lessons to help you learn and grow as a music producer. We focus on teaching you in a way that fits your goals and how you learn best.
Want to see what it's like? You can book a free 30-minute chat with us! This is a relaxed talk where you can tell us what you want to achieve with your music. We'll give you honest advice and help you figure out the best way to start your music-making adventure. There's no pressure or obligation – just a friendly chat to help you get started. Book your free session here: Book a Free Session
We can't wait to help you bring your musical ideas to life!
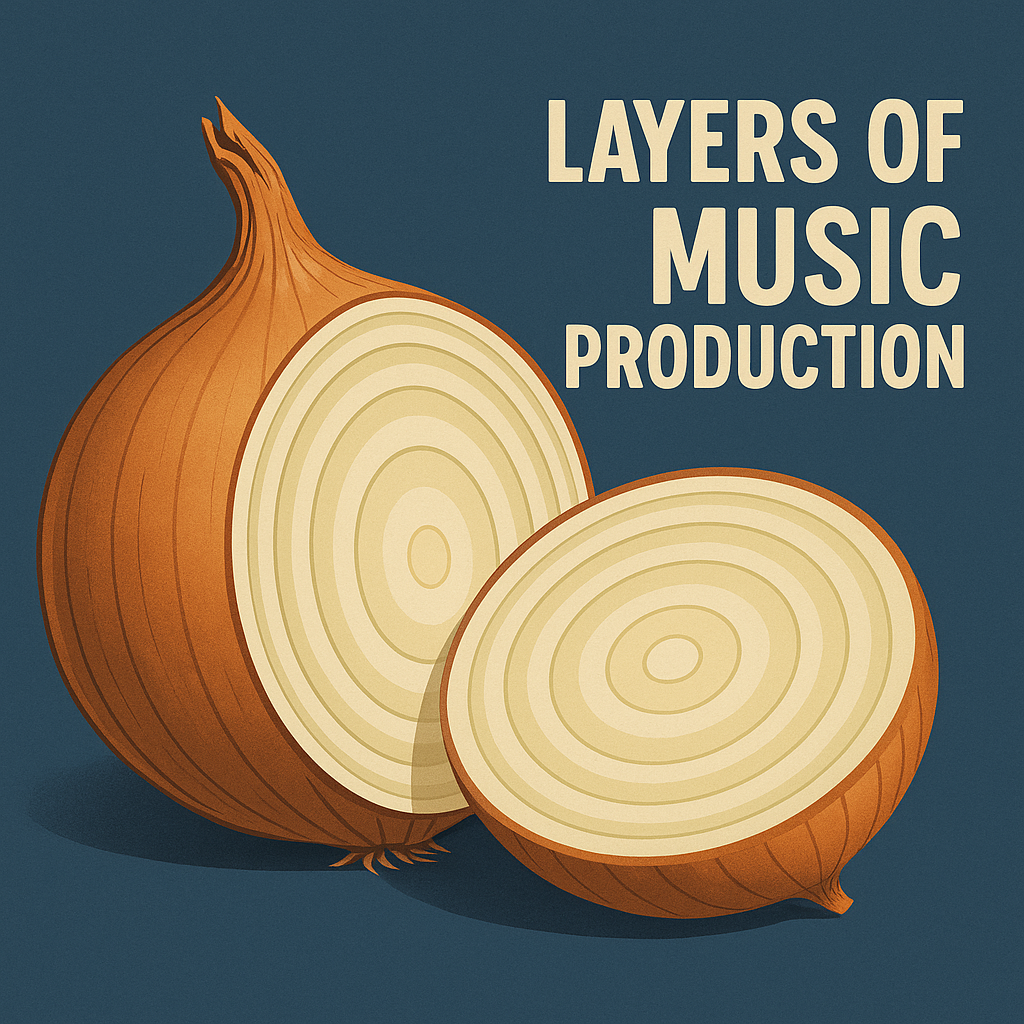
Music Production Is Like an Onion — And You’re Probably Still on the First Couple Layers
Music production isn’t just about learning the software — it’s about peeling back layers of understanding. From building basic loops to sculpting sound like a master craftsperson, each stage reveals a new depth. Most producers only ever scratch the surface. This post breaks down the six layers that separate beginners from real sonic storytellers — and how to know where you are in the process.

Ever opened Ableton for the first time, dropped in a kick drum, and thought, “Cool, I made a beat”—only to later discover how deep the rabbit hole really goes? Music production isn’t a checklist. It’s an evolving craft. Like an onion, it has layers—and the more you peel back, the more your sound (and your curiosity) expands.
So what’s this article about?
This piece is for anyone on the production journey—whether you've just started or you’re stuck in a creative plateau. We’ll break down the layers of music production, from the basics to the often-overlooked psychological and creative processes that define your growth. Each layer represents a stage of learning, and none of them are ‘one-and-done’. Like revisiting an old track with fresh ears, each layer invites you back with new perspective.
Teaching Through the Layers
As a teacher, one of the most important parts of my job is figuring out where someone is in the layers.
Sometimes, students come to me after months—or years—of self-teaching, unsure why their tracks aren’t clicking. Other times, they’re total beginners who’ve just installed Ableton and don’t even know what they don’t know yet.
Either way, I have to meet people where they are—and be honest about what lies ahead.
That means:
Helping you build confidence in the layer you’re currently in
Filling in blind spots that might be holding you back
And guiding you through the next stage without overwhelming you
There’s no shame in being early in your journey. What matters is having someone who knows the map—and can help you navigate it with clarity, momentum, and a sense of fun.
Let’s peel them back.
Layer 1: Getting Started — Scratching the Surface
At this stage, you’re focused on the fundamentals:
Loading samples, building loops, playing with Drum Racks.
Arranging clips in Session or Arrangement View.
Experimenting with warp modes, EQ Eight, and maybe a few presets.
It’s exciting, but also overwhelming. You’re learning what each button does—not necessarily why you’d use it.
Common mindset: “I’ve made a tune!”
Reality: You’ve built a loop or sketch—great start, but this is only the first rung on the ladder.
Key insight:
Many learners stay here longer than they need to because they don’t realize there is a structure behind what makes tracks sound pro. This is where having guidance speeds up the process massively.
Layer 2: Structure & Flow
Here’s where things get sticky. You can make great 8-bar loops—but turning them into a track that flows? That’s a different skill set.
In this layer, you learn:
How to build intros, breakdowns, drops, and outros.
The art of tension and release using filters, automation, and silence.
How professional producers use variation to hold attention without overwhelming the listener.
Key insight:
A track should feel like a story. Without structure, your loop becomes repetitive noise. With structure, you create movement—and movement is music.
Layer 3: Sound Design & FX
Once you’ve nailed structure, your curiosity shifts:
“How do I make my own sounds?”
“How do they get that squelchy bass or that airy pad?”
This is where you dive into:
Synthesis (Subtractive, FM, Wavetable, etc.)
Sampling techniques beyond just drag-and-drop
Effect chains and creative processing with reverb, delay, distortion, vocoders, and more
Resampling and audio manipulation tricks that give your work character
Key insight:
Preset hunting can only get you so far. This layer is about expressing your sound and understanding why something sounds the way it does.
Layer 4: Mixing & Space
Now you’re not just thinking about the music—but the sound environment.
You begin to:
Think in frequency ranges (lows, mids, highs)
Use EQ surgically—not just “make it sound better”
Balance elements with volume, stereo placement, compression
Learn about gain staging, headroom, and reference tracks
Understand how sounds sit together in the mix vs. in isolation
Key insight:
Mixing isn’t just a technical process—it’s how you shape emotion and energy. Great production sounds simple on the surface because the mix is clean, deliberate, and emotionally intentional.
Layer 5: The Psychology of Production
This layer is the most overlooked—and often the most important.
Here, you face:
Perfectionism: “It’s not finished until it’s perfect… so I never finish it.”
Comparison paralysis: “Why does their mix sound better than mine?”
Creative fatigue: “I’ve been working on this track for 6 months and I hate it now.”
The Drop-Off Cliff: “I’ve learned loads… now I’m stuck.”
This is where coaching and community become game-changers.
You don’t need more plugins—you need a better feedback loop, some accountability, and the reminder that fun and momentum matter more than technical mastery alone.
Key insight:
Your mindset determines your output. You’re not just learning how to use Ableton—you’re learning how to stay inspired over the long term.
Layer 6: Mastery — Understanding Sound as Material
At this depth, you’re no longer just arranging sounds. You’re shaping energy.
You’ve moved past workflows, past tricks, past templates—and now you’re listening differently.
This is where music production becomes less about tools and more about material intuition. Like a blacksmith working steel, you begin to understand sound as something you can feel and bend with intent.
You start to ask:
Why does this harmonic cluster feel tense?
How can microtonal shifts evoke entirely new emotional shades?
What frequencies aren’t being heard, but are still being felt?
Here, you’re working with:
Resonance, dissonance, and harmonic structure
Psychoacoustics and how the ear prioritises frequencies
Microtonality and alternative tuning systems
Shaping sound based on feeling and flow, not just meter or key
Key insight:
This layer isn’t about showing off technical mastery. It’s about removing friction between what you hear in your head and what comes out of your speakers. It’s the point where production feels less like construction—and more like channeling.
Final Thoughts: You Don’t Just Learn Music Production—You Grow With It
Each layer builds on the last—but none of them are truly ‘finished’.
You’ll revisit them all as your skills evolve, sometimes looping back to the basics with new eyes and ears.
My main advice here would be to never stop learning, never stop digging into each layer and discovering new techniques and ideas. The music production learning journey is long and winding and it is there to be enjoyed.
I would also like to add that great music can be created with only the first few layers peeled back - limitation is often the source of creativity and it is true that the more you know, the harder it can be to decide what direction to take. However, the deeper you go, the more personalised your sound will become, the more intentional your decisions will be, and the more technical your production techniques will be.
Ready to start peeling back your own layers?
Book a free 30-minute intro session and let’s map out your ideal learning path:
👉 Start Your Journey WITH A FREE ONE ON ONE SESSION.

How to Stop Losing Ableton Projects: Folder Setup, Backups & Sample Management
Stop losing your music! This guide shows you how to properly set up your Ableton folders, relocate your User Library, manage samples, and back everything up to avoid missing files and hard drive disasters.

How to Organise, Back Up, and Bulletproof Your Ableton Work
If you’ve ever opened an Ableton project and been greeted by “Media Files Missing” — or worse, lost entire sessions to a failed hard drive — you know how painful it can be. The good news? It’s completely avoidable.
This guide walks you through a bulletproof system to organise your files, safeguard your work, and future-proof your music production setup.
I personally have had some complete nightmares when it comes to losing Ableton projects, and until it happens to you (unless it already has) then you can not fathom the absolute pain knowing your work is lost forever. One time I had a harddrive failure and I lost 2 EPs that were ready for a label along with a remix. No joke, I couldn’t face opening Ableton for MONTHS after this - I was devastated.
I have also witnessed, and regularly have to fix many students filing systems in order to prevent such a headache happening to them. As we should all know by now with technology, if it can go wrong eventually it will go wrong.
So today I present a fool proof way to sort your stuff out and never lose a project, sample or preset again.
Step 1: Use a Dedicated Hard Drive for Music Production
Let’s start with the foundation. If you’re producing regularly — especially with sample packs — your internal hard drive will fill up fast. That’s where a dedicated external hard drive becomes a game-changer.
Everything Ableton-related lives here:
Projects
Samples
Presets
User Library
This keeps your system clean, makes backups easier, and lets you take your entire setup anywhere. I recommend an SSD especially if you are going to be taking the harddrive with you and moving it around. (The story above of mine was due to the mechanical failure of a disk hard drive.
Recommendation - Samsung T7, SanDisk Extreme.
Step 2: Locate and Move Your Ableton User Library
Ableton creates the User Library automatically when you install the software and this is where it stores your custom presets, samples, effect racks, and more.
To move it to your external drive:
In Ableton’s left sidebar, locate the User Library under “Places”
Right-click it and select “Show in Finder” (Mac) or “Show in Explorer” (Windows)
Drag the entire User Library folder into your newly created
/Ableton Masterfolder on your external hard driveNow go to Ableton > Preferences > Library
Under Location, click “Change” and point it to the new User Library location on your external drive
This keeps your custom content in one place and prevents Ableton from creating duplicates across your system.
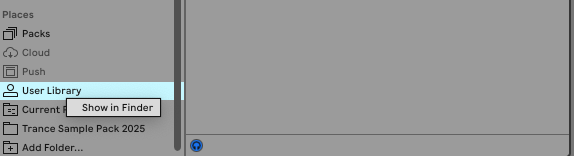
1&2: Locate your User Library

3. Drag the User Library to your Master Folder.

4 & 5: Point Ableton to the correct User Library.
Step 3: Create a Folder for All Your Projects
Still inside your /Ableton Master folder, create a new folder called /Projects.
From now on, every .als file you create should live here.
This keeps your Project Files for every project you start. If you have projects randomly located around your computer then find them and drag them into this.
Bonus Advice - Organise your Projects by year, and genre. So have a folder inside your Projects folder called “2025”. This will allow you to go back and find projects down the line with ease as trust me, you will have a lot of projects after a year or two using Ableton.

My own filing system for my Live Projects - each year also has sub-folders of each genre as I make and teach many different styles
Step 4: Keep All Samples Inside the User Library
Dragging in samples from random folders? That’s a recipe for disaster.
Instead:
Manually place new samples into
/User Library/Samples/ImportedOr, drag them into that folder from within Ableton’s Browser
This ensures:
Everything you use stays within your Master Folder
No broken sample paths
Clean project loading, every time

This is the User Library Sample folder inside of Ableton - this will have all your samples so you can drag them into your project.

In order to add samples to the folder - add them by dropping them directly into the folder on your hard drive. They will then show inside of the Ableton Sample folder.
Step 5: Use “Collect All and Save” (At Key Points)
Even with a tidy setup, samples from outside folders can sneak into your projects.
Use File > Collect All and Save when:
You’re finishing a track
You’re about to collaborate or send the file
You’re archiving or backing it up
This pulls all external samples into the project folder — fully self-contained and portable.

Step 6: Back It All Up to the Cloud
Even external drives can fail. The final line of defence is a real-time cloud backup.
I use and highly recommend Dropbox due to the ability to back up multiple devices in real-time.
Sync your entire /Ableton Master folder, so:
Every project and sample is backed up continuously
You get version history (rollback if needed)
You can work across machines with zero friction
If the worst case happens and you do lose your hard drive then all you need to do is download your backed up Master Folder and put it on your new hard drive.
Summary: Your Bulletproof Ableton File System
Use a dedicated external hard drive
Move your User Library into a central Master Folder
Save all projects into a
/ProjectsfolderStore all samples in the User Library
Use Collect All and Save at milestones
Set up cloud sync for real-time, off-site backup
Ready to Take Your Music Further?
You’ve just sorted your folders — now let’s sort your sound.
At Decloak Music, we offer one-to-one online lessons in:
Ableton Live – From absolute beginner to advanced production
Synthesis & Sound Design – Create your own signature sounds
Workflow & Creative Coaching – Get unstuck and finish more music
All tailored to your genre, your goals, and your schedule.
👉 Book your free 30-minute intro session and start making real progress with your music today.
Thinking of Starting with Ableton Live? Answers to the Most Common Beginner Questions (2025 Guide)
Before you buy gear, watch hours of YouTube, or get lost in settings you don’t understand — read this.
We’ve answered 20 of the most common beginner questions about Ableton Live and music production. From “Do I need music theory?” to “Can I make good music with just headphones?” — this guide cuts through the noise and gives you clear, honest answers.
Whether you’re starting from scratch or picking it back up after a break, this is the perfect place to begin.

If you’ve ever wanted to make your own music but had no idea where to begin, Ableton Live is one of the most powerful — and beginner-friendly — tools you can learn. But starting out can feel overwhelming. What version do you need? Is it hard to learn? What equipment is essential?
In this guide, we answer the most common beginner questions about starting with Ableton Live. Whether you’re a total novice or switching from another DAW, this article will give you a clear, confident path forward — with expert advice drawn from over a decade of teaching experience.
Take a look at the most questions below and if you still have any others then feel free to contact us! We are always happy to help.
Do I need any music production experience to start Ableton Live?
Not at all. Ableton Live is designed to be accessible to complete beginners while still offering deep creative power for pros. If you’re starting from scratch, you’ll benefit from learning the core tools, basic music structure, and how to turn your ideas into finished tracks — which is exactly what our beginner course is built for.
What version of Ableton should beginners use?
For most beginners, Ableton Live Intro is a great place to start — it’s affordable and includes all the essentials. If you’re ready to dive deeper or want access to more instruments and audio effects, Ableton Live Standard offers a great balance. We don’t usually recommend going straight to Suite unless you know you’ll be using Max for Live or advanced sound design tools.
What equipment do I need to get started?
To get going with Ableton Live, you’ll need:
A computer (Mac or Windows)
Headphones or speakers
Ableton Live (Intro, Standard, or Suite)
Optional but not essential gear:
A MIDI controller (great for hands-on control)
An audio interface (if you want to record vocals or instruments)
An external hard drive (helpful for storing samples if your laptop is limited on space)
What kind of music can I make with Ableton Live?
Anything — from house, techno, and drum & bass to hip-hop, ambient, pop, or even film scoring and experimental sound design. Ableton Live is genre-agnostic. At Decloak Music, we tailor every course to your musical taste so you’re always learning in a style that excites you.
How long does it take to learn?
Most students start making full tracks within a few weeks, but mastering the software and refining your sound can take months or years — depending on your pace, experience, and goals. Our structured courses are designed to dramatically accelerate your learning curve, with clear progress each session.
How Much Time a day / week / month do I need to spend on Ableton Live to get good?
This varies from person to person — and it depends on what “good” means to you. Music production involves many skills: beat-making, sound design, sampling, arrangement, mixing, and more. You don’t need to master everything at once to make something that sounds great — but consistency is key.
We recommend aiming for at least 4 hours per week to build real momentum. That gives you time to absorb new techniques, practice hands-on, and gradually build confidence.
When students take our courses, we suggest spending 4+ hours between each lesson to revisit what was covered, apply the techniques, and develop a track to bring back. This habit leads to faster results — because nothing beats putting the time in.
What’s the best way to actually learn Ableton Live in 2025?
The best way is one-to-one tuition with an experienced producer who tailors the lessons to your goals. Paired with hands-on practice, this approach beats any YouTube binge or pre-recorded course. Whether you’re learning beat-making, arrangement, or advanced mixing, our Ableton Live courses are built to get you there — faster, clearer, and with full support.
What if I have no idea what kind of music I want to make?
You don’t need to decide right away. One of the best parts of learning music production is discovering what excites you. We encourage beginners to explore a few different genres — from house and techno to ambient or experimental — until something clicks. At Decloak, we tailor each session to your taste, so you can evolve naturally without pressure to “pick a lane” too early.
Can I use Ableton Live for DJing or live performance?
Yes — Ableton Live is one of the most powerful tools for live performance and DJ-style sets. Its unique Session View lets you launch loops, samples, and full tracks on the fly, making it perfect for hybrid DJ sets, live remixing, or even jamming with instruments. We teach you how to build flexible, performance-ready sets that reflect your style.
Can I record vocals or instruments in Ableton Live?
Absolutely. Ableton Live is a full-featured digital audio workstation (DAW) that makes recording vocals, guitars, synths, or any instrument easy. You’ll need an audio interface and microphone (we’ll help you choose), and we’ll show you how to set levels, record clean takes, and even layer harmonies or effects.
Can I make professional-sounding music without expensive gear?
Yes — many producers create fully released tracks with nothing more than a laptop and headphones. Ableton Live comes with built-in instruments and effects that are more than enough to start sounding polished. With the right techniques, creativity beats gear every time — and we’ll teach you how to get the most from what you have.
Can I use Ableton to make remixes or mashups?
Yes — and it’s one of the most fun ways to learn. Ableton Live’s Warping tools make it easy to sync up different tracks, chop vocals, and blend elements from multiple songs. Whether you’re remixing a friend's tune or mashing up two classics, we’ll guide you through the creative and legal side of remixing.
Do I need to know music theory to start producing?
No — music theory can help, but it’s not a barrier. Ableton Live includes tools like scale modes, MIDI effects, and clip quantization that make writing musical ideas easier, even if you don’t read sheet music. We’ll teach you creative shortcuts and, if you’re curious, introduce basic theory concepts as you go.
Should I buy a full keyboard and learn piano to start in Ableton Live?
Not at all. You can draw in notes with your mouse or play them using your computer keyboard. A small MIDI controller (25–49 keys) can help if you prefer hands-on input, but it’s optional. Learning piano can help later on, but you don’t need to study it before making music. Our courses focus on practical creativity — not classical training.
Conclusion
Still unsure where to begin?
At Decloak Music, we specialise in teaching music production one-to-one using Ableton Live — with lessons tailored to your goals, your music taste, and your current experience level.
If you're just starting out and feeling overwhelmed, you're not alone. That’s why we offer a free 30-minute intro session where we’ll walk you through how our lessons work, assess where you're at, and help you map out the best route to reach your musical goals — whether that’s making your first track, understanding music theory, or preparing for release.
There’s no pressure and no obligation — just real advice from experienced producers who’ve helped hundreds of beginners get started.
👉 Book your free intro session now and take your first step into music production with confidence.